
이번 글은 Spring의 DI(의존성 주입)이 어떻게 동작하는 것 일까? 란 의문으로부터 공부한 글 입니다.
여러 블로그와 백기선님의 더 자바 강의를 살펴보며 정리한 글 입니다.
1. 리플렉션 API 1부 : 클래스 정보 조회
Reflection은 Class<T>를 통해서 접근할 수 있다.
Class (Java Platform SE 8 )
Determines if the specified Class object represents a primitive type. There are nine predefined Class objects to represent the eight primitive types and void. These are created by the Java Virtual Machine, and have the same names as the primitive types tha
docs.oracle.com
Class 내부의 메서드를 통해서 Class에 있는 필드, 부모 class, class가 구현하고 있는 interface, 메서드 목록등에 접근할 수 있다.
예를 들어 다음과 같은 class가 있다고 해보자. 완전 실험용 class 이다.
public class Book {
    private static String b = "b";
    private static final String c = "c";

    private String a = "a";
    public String d = "d";
    protected String e = "e";

    public Book() {
    }

    public Book(String a, String d, String e) {
        this.a = a;
        this.d = d;
        this.e = e;
    }

    private void f() {
        System.out.println("f");
    }

    public void g() {
        System.out.println("g");
    }

    public int h() {
        return 77;
    }
}
이를 상속하는 자식 class과 interface도 하나씩 만들어주자.
public interface BookInterface {}

public class ChildBook extends Book implements BookInterface{}
Class<T>에 접근하는 방법 크게 3가지가 있다.
- 타입을 통해 접근
- 인스턴스를 통해 접근
- 문자열만을 통해 접근
1-1) 타입을 통해 접근
class는 클래스 로더를 통해 동적으로 로딩되며, 로딩된 후에는 Heap에 인스턴스가 저장된다.
따라서 다음과 같이 "타입.class"를 통해 타입으로 접근할수가 있다.
이렇게 가져온 인스턴스를 통해 여러 메서드를 사용할수가 있다.

Book.class는 'Book 클래스'에 대한 정보를 담고 있는 인스턴지 Book 인스턴스가 아니기 때문에 Book 인스턴스의 멤버 변수값을 가져올 수 없다.
1-2) Instance가 있는 경우
public static void main(String[] args) {
    Book book = new Book();
    Class<? extends Book> aClass = book.getClass();
}
위와 같이 new 연산자를 통해 생성된 instance가 있는 경우 "인스턴스.getClass()" 를 통해서 접근할 수 있다.
1-3) 문자열을 통한 접근
다음과 같이 FQCN을 통해서도 class 타입에 접근할 수 있다.
public static void main(String[] args) throws ClassNotFoundException {
    Class<?> aClass = Class.forName("me.shine.Book");
}
1-4) Class 타입의 정보에 접근하기
▶ Field에 접근하기
getFields를 통해 접근하여 출력해보자.
public static void main(String[] args) {
    Class<Book> bookClass = Book.class;

    Arrays.stream(bookClass.getFields())
            .forEach(System.out::println);
}
딱 한줄 출력되는것을 확인할 수 있다.
public java.lang.String me.shine.reflection.Book.dgetFields()는 public 한 필드만 접근할수가 있다.
다음과 같이 getDeclaredFields를 사용해야 모든 필드에 접근할 수 있다.
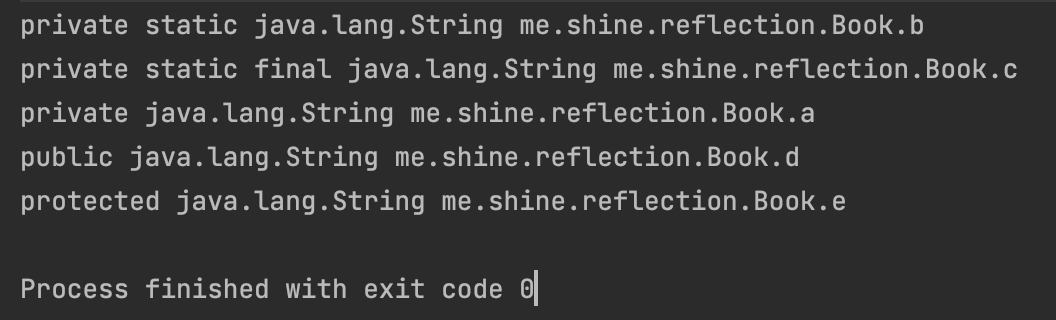
Arrays.stream(bookClass.getDeclaredFields())
        .forEach(System.out::println);
출력되는 결과는 다음과 같다.
만약 값을 가져오고 싶다면 instance를 new 연산자를 통해 생성해야 한다.
public static void main(String[] args) {
    Class<Book> bookClass = Book.class;
    Book book = new Book();

    Arrays.stream(bookClass.getDeclaredFields())
            .forEach(f -> {
                try {
                    System.out.printf("%s %s", f, f.get(book));
                } catch (IllegalAccessException e) {
                    e.printStackTrace();
                }
            });
}
위 코드와 같이 forEach를 돌면서 실행하는 경우 에러가 발생하게 된다.
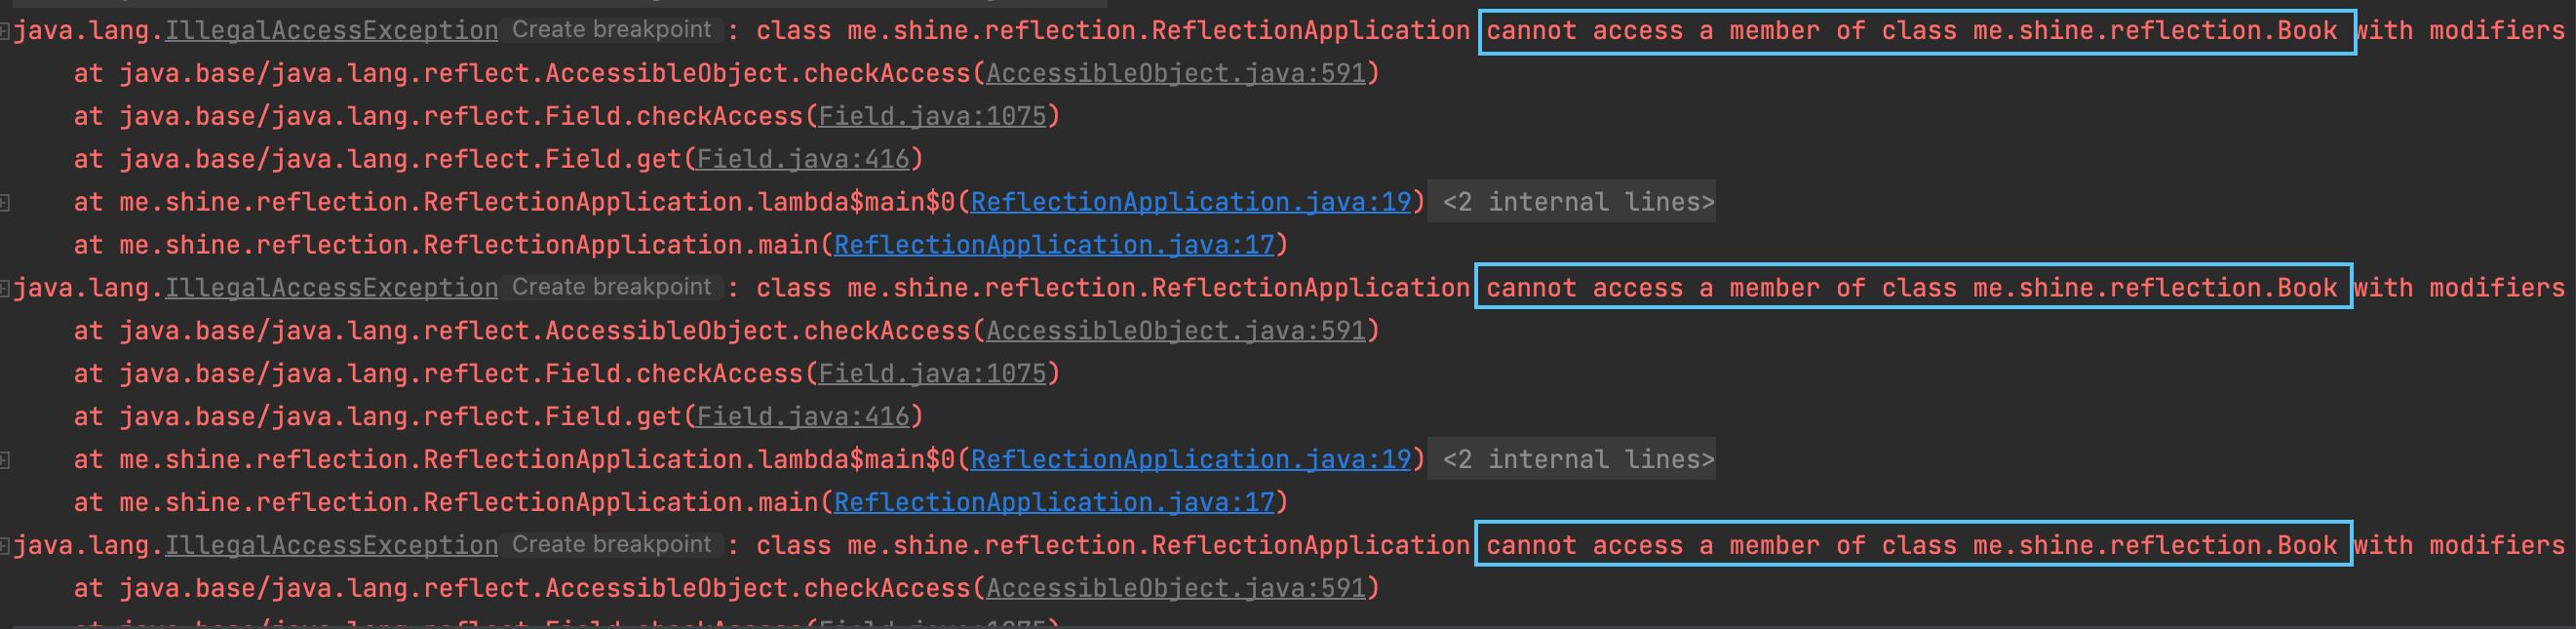
접근할수 없는 field이기 때문이다.
이때 다음과 같이 f.setAccessible(true)를 사용하면 접근할수 있게 된다.
Arrays.stream(bookClass.getDeclaredFields())
        .forEach(f -> {
            try {
                f.setAccessible(true);
                System.out.printf("%s %s", f, f.get(book));
            } catch (IllegalAccessException e) {
                e.printStackTrace();
            }
        });
▶ 메서드에 접근하기
public static void main(String[] args) {
Class<Book> bookClass = Book.class;
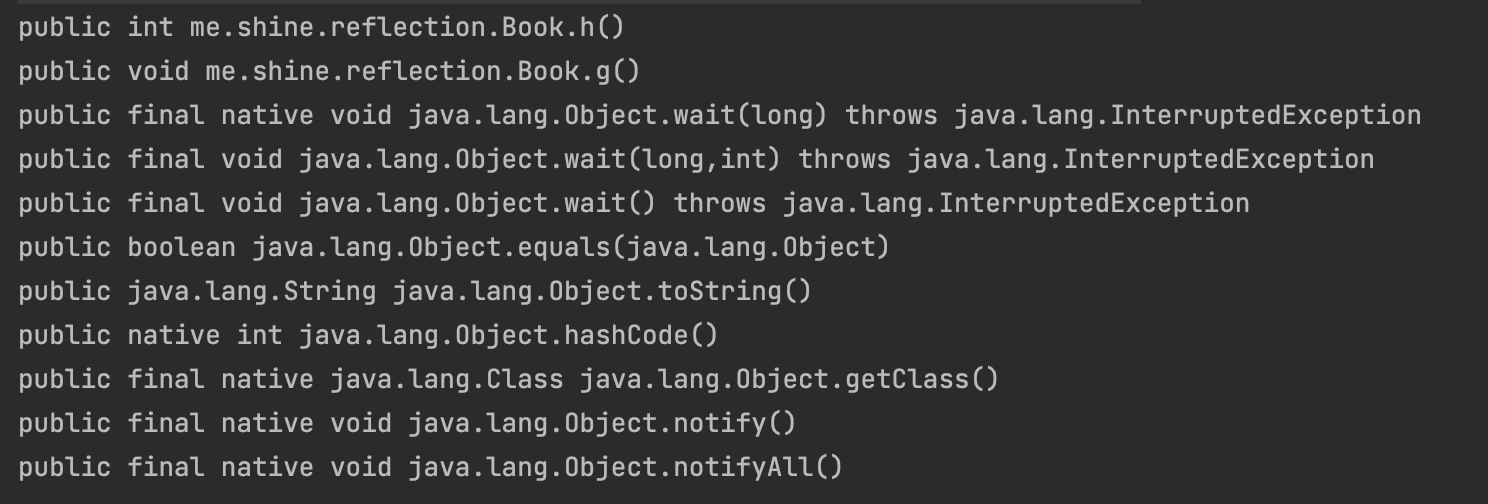
Arrays.stream(bookClass.getMethods())
.forEach(System.out::println);
}모든 메서드에 대한 정보에 접근할수가 있다.
▶ 생성자에 접근하기
public static void main(String[] args) {
    Class<Book> bookClass = Book.class;

    Arrays.stream(bookClass.getDeclaredConstructors())
            .forEach(System.out::println);
}
실행결과는 다음과 같다.

우리가 만들었던 기본생성자와 값을 받는 생성자 2개에 대한 정보가 확인 가능하다.
▶ 부모 class에 접근하기
public static void main(String[] args) {
    System.out.println(ChildBook.class.getSuperclass());
}
출력결과는 다음과 같다.
class me.shine.reflection.Book
▶ Interface에 접근하기
public static void main(String[] args) {
    Arrays.stream(ChildBook.class.getInterfaces())
            .forEach(System.out::println);
}
출력 결과는 다음과 같다.
interface me.shine.reflection.BookInterface
위와 같은 API들을 통해 class 정보에 접근하여 사용이 가능하다. 다음 예시를 살펴보자.
public static void main(String[] args) {
    Arrays.stream(Book.class.getDeclaredFields())
            .forEach(f -> {
                int modifiers = f.getModifiers();
                System.out.println("field = " + f);
                System.out.println("isPrivate = " + Modifier.isPrivate(modifiers));
                System.out.println("isStatic = " + Modifier.isStatic(modifiers));
                System.out.println("===========================");
            });
}
이렇게 reflection을 사용하면 해당 class에 대한 여러 정보에 접근할수가 있다.
다음 단락에서는 단순 데이터에 대한 접근이 아닌, 변경하고 사용하는 방법에 대하여 알아보자.
2. 리플렉션을 통한 애노테이션 접근
기본적으로 Annotation을 주석이랑 같은 취급을 받기 때문에 해당 Annotation의 정보가 source, class 까지는 남지만,
이 class(바이트 코드)를 로딩했을때 메모리상에는 남지 않는다.
따라서 Runtime 까지 Annotation의 정보를 가져가고 싶다면 Retention을 설정해줘야 한다.
@Retention(RetentionPolicy.RUNTIME)
public @interface MyAnnotation {
}
이렇게 설정하면 reflection을 통해서도 접근이 가능해진다.
또한 @Target()을 통해 해당 에노테이션을 붙일수 있는 곳을 정할수 있다.
@Retention(RetentionPolicy.RUNTIME)
@Target({ElementType.TYPE, ElementType.FIELD})
public @interface MyAnnotation {
}
에노테이션에는 다음과 같이 값을 부여할수가 있다.
@Retention(RetentionPolicy.RUNTIME)
@Target({ElementType.TYPE, ElementType.FIELD})
public @interface MyAnnotation {
    String value()  default "Shine";
}
default값을 지정해줄 수 있으며, 이름으로 value() 를 주면 값이 하나인 경우 유용하다.
다음과 같이 필드이름 지정없이 바로 값을 전달할수 있기 때문이다.
@MyAnnotation(value = "Shine", ...) // 값이 여러개 있는 경우
@MyAnnotation("Shine") // 값이 하나인 경우
또한 @Inherited 를 추가해주면 @MyAnnotation을 추가해둔 Book class의 자손인 ChildBook에서도 에노테이션의 정보에 접근이 가능하다.
@Retention(RetentionPolicy.RUNTIME)
@Target({ElementType.TYPE, ElementType.FIELD})
@Inherited
public @interface MyAnnotation {
    String value()  default "Shine";
    int number() default 77;
}
자식 클래스를 통해 접근해보자.
public static void main(String[] args) {
    Arrays.stream(ChildBook.class.getAnnotations())
            .forEach(System.out::println);
}
출력 결과는 다음과 같다.
@me.shine.reflection.MyAnnotation(value="Shine", number=77)
위와같이 부모 class 에 있는 에노테이션 정보가 아닌, 자신의 class에 있는 에노테이션 정보에 접근하고 싶다면 다음과 같이 getDeclaredAnnotations()를 사용하면 된다.
public static void main(String[] args) {
    Arrays.stream(ChildBook.class.getDeclaredAnnotations())
            .forEach(System.out::println);
}
이번에는 annotation을 추가한 여러 필드에 접근해보자.
@MyAnnotation("class")
public class Book {

    @MyAnnotation("field")
    private String a = "a";
    public String d = "d";
    protected String e = "e";

    public Book() {
    }

    @MyAnnotation("constructor")
    public Book(String a, String d, String e) {
        this.a = a;
        this.d = d;
        this.e = e;
    }

    @MyAnnotation("method")
    private void f() {
        System.out.println("f");
    }
}
실행할 코드는 다음과 같다. 필드에 접근하여 출력하는 코드이다.
public static void main(String[] args) {
        Arrays.stream(Book.class.getDeclaredFields())
                .forEach(field -> {
                    Arrays.stream(field.getAnnotations())
                            .forEach(a -> {
                                if (a instanceof MyAnnotation) {
                                    MyAnnotation myAnnotation = (MyAnnotation) a;
                                    System.out.println("myAnnotation = " + myAnnotation.value());
                                }
                            });
                });
}
출력 결과는 다음과 같다.
myAnnotation = field특정 에노테이션에 있는 값들에 접근할수 있는것 이다.
3. 리플렉션 API 2부: 클래스 정보 수정 또는 실행
다음과 같은 test용 class를 하나 만들자.
public class Book {

    public static String a = "A";
    private String b = "B";

    public Book() {
    }

    public Book(String b) {
        this.b = b;
    }

    private void c() {
        System.out.println("C");
    }

    public int sum(int first, int second) {
        return first + second;
    }
}
3-1) Field에 접근하기
이를 활용하는 코드는 다음과 같다.
public static void main(String[] args) throws ClassNotFoundException, NoSuchMethodException, InvocationTargetException, InstantiationException, IllegalAccessException, NoSuchFieldException {
Class<?> bookClass = Class.forName("me.shine.reflection.Book");
// 기본생성자 사용
System.out.println("====================");
Constructor<?> constructor = bookClass.getConstructor(null);
Book newBook = (Book) constructor.newInstance();
System.out.println("newBook = " + newBook);
// 파라미터가 있는 생성자 사용
System.out.println("====================");
Constructor<?> constructor2 = bookClass.getConstructor(String.class);
Book newBook2 = (Book) constructor2.newInstance("Shine");
System.out.println("newBook2 = " + newBook2);
// 필드 가져오기
System.out.println("====================");
Field aField = Book.class.getDeclaredField("a");
System.out.println(aField.get(null));
// 값을 설정하는 경우
System.out.println("====================");
aField.set(null, "설정된 값 ");
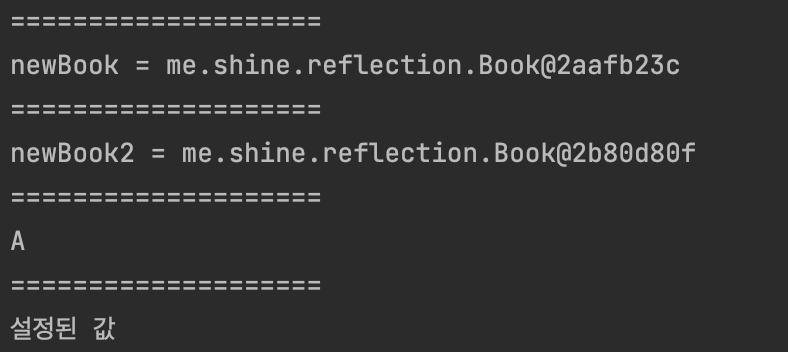
System.out.println(aField.get(null));
}a 는 static 필드이기 때문에 instance가 필요없다.
실행 결과는 다음과 같다.
이번에는 특정 인스턴스가 필요한 필드에 접근해보자.
특정 인스턴스가 가지고 있는 값을 가져오는 것이기 때문에 인스턴스가 필요하다.
Static 필드를 가져올 때는 object가 없어도 되니까 null을 넘겼던것 이다.
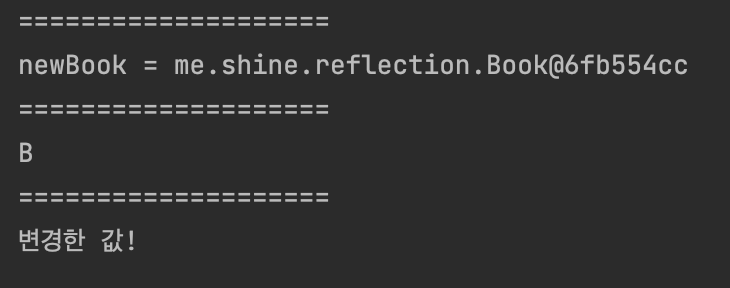
public static void main(String[] args) throws ClassNotFoundException, NoSuchMethodException, InvocationTargetException, InstantiationException, IllegalAccessException, NoSuchFieldException {
    Class<?> bookClass = Class.forName("me.shine.reflection.Book");

    // 기본생성자 사용
    System.out.println("====================");
    Constructor<?> constructor = bookClass.getConstructor(null);
    Book newBook = (Book) constructor.newInstance();
    System.out.println("newBook = " + newBook);

    // 특정 인스턴스가 필요한 필드
    System.out.println("====================");
    Field bField = Book.class.getDeclaredField("b");
    bField.setAccessible(true);
    System.out.println(bField.get(newBook)); // 인스턴스를 설정

    // 값을 설정하는 경우
    System.out.println("====================");
    bField.set(newBook, "변경한 값!");
    System.out.println(bField.get(newBook));
}
출력 결과는 다음과 같다.
3-2) Method에 접근하기
public static void main(String[] args) throws ClassNotFoundException, NoSuchMethodException, InvocationTargetException, InstantiationException, IllegalAccessException, NoSuchFieldException {
    Class<?> bookClass = Class.forName("me.shine.reflection.Book");

    // 기본생성자 사용
    System.out.println("====================");
    Constructor<?> constructor = bookClass.getConstructor(null);
    Book newBook = (Book) constructor.newInstance();
    System.out.println("newBook = " + newBook);

    // 특정 인스턴스에 해당하는 private 메서드 가져오기
    System.out.println("====================");
    Method methodC = Book.class.getDeclaredMethod("c");
    methodC.setAccessible(true);
    methodC.invoke(newBook);

    // 특정 인스턴스에 해당하는 public 메서드 가져오기
    System.out.println("====================");
    Method methodD = Book.class.getDeclaredMethod("sum", int.class, int.class);
    int result = (int) methodD.invoke(newBook, 3, 5);
    System.out.println("result = " + result);
}
출력 결과는 다음과 같다.

4. DI 프레임워크 만들기
이번 시간에는 간단하게 나마 DI 프레임워크를 직접 만들어서 사용해보자.
4-1) @Inject 만들기
우선 @Inject 라는 애노테이션을 다음과 같이 만들자.
@Retention(RetentionPolicy.RUNTIME)
public @interface Inject {
}
다음으로는 간단한 Repository 와 Service를 만들자.
4-2) BookRepository, BookService
public class BookRepository {

    public void build() {
        System.out.println("첵을 만드는 중...");
    }
}

public class BookService {

    @Inject
    BookRepository bookRepository;

    public void createBook() {
        bookRepository.build();
        System.out.println("BookService : create");
    }
}
service를 보면 @Inject를 사용하고 있다.
해당 애노테이션을 통해 BookRepository에 BookService를 의존성 주입을 시키는것이 우리의 목표 이다.
4-3) ContainerService
@Inject를 보고 의존성을 주입시켜주는 ContainerService를 만들어 보자.
public class ContainerService {

    public static <T> T getObject(Class<T> classType) {
        T instance = createInstance(classType);
        Arrays.stream(classType.getDeclaredFields())
                .forEach(f -> {
                    Inject annotation = f.getAnnotation(Inject.class);
                    if(annotation != null) {
                        Object fieldInstance = createInstance(f.getType());
                        f.setAccessible(true);
                        try {
                            f.set(instance, fieldInstance);
                        } catch (IllegalAccessException e) {
                            throw new RuntimeException(e);
                        }
                    }
                });

        return instance;
    }

    private static <T> T createInstance(Class<T> classType) {
        try {
            return classType.getConstructor(null).newInstance();
        } catch (InstantiationException | IllegalAccessException | InvocationTargetException | NoSuchMethodException e) {
            throw new RuntimeException(e);
        }
    }
}
class의 type을 받아 인스턴스를 우선 하나 만든다. (우리의 예시에서는 BookService)
또한 class의 타입을 통해 해당 클래스의 field를 살펴보면서 @Inject 애노테이션이 있는지 살펴본다.
만약 애노테이션이 있다면 @Inject가 적용된 필드의 타입으로 해당 인스턴스(우리는 BookRepositroy)를 생성한다.
f.set(instance, fieldInstance);이후 set을 통해서 BookService에 repository를 setting해준다.
이렇게 DI 된 BookService를 반환하면 되는 것 이다.
'BackEnd > Java' 카테고리의 다른 글
| [Java] Annotation Processor (0) | 2022.06.08 |
|---|---|
| [Java] Dynamic Proxy (0) | 2022.06.07 |
| [Java] 바이트코드 조작하기 (0) | 2022.05.20 |
| [Java] JVM 구조 (0) | 2022.05.19 |
| [Java] equals, hashCode 를 같이 구현하는 이유 (0) | 2022.05.08 |
댓글